I have currently planned to use a 100-150 liter tank. This should provide enough reserves to be able to get by without refueling for a few days. Unfortunately I can’t estimate how much water I use on a normal day and so I’m planning a bit bigger.
Now the tank is selected and placed but what happens next?
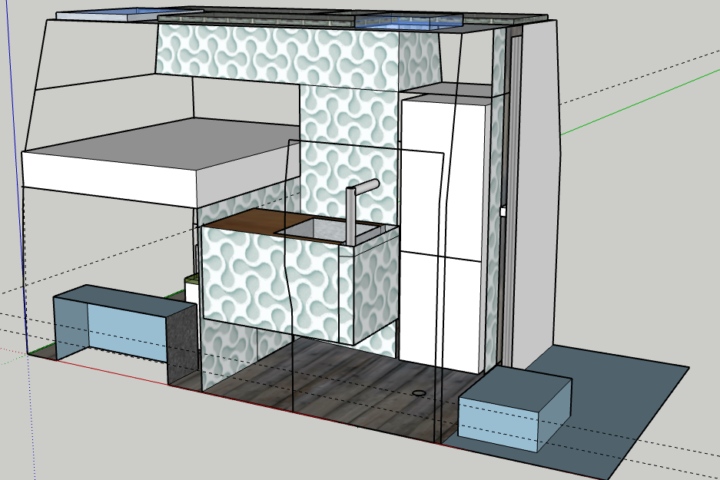
2. the sink
3. the drinking water tap
What does the construction look like?
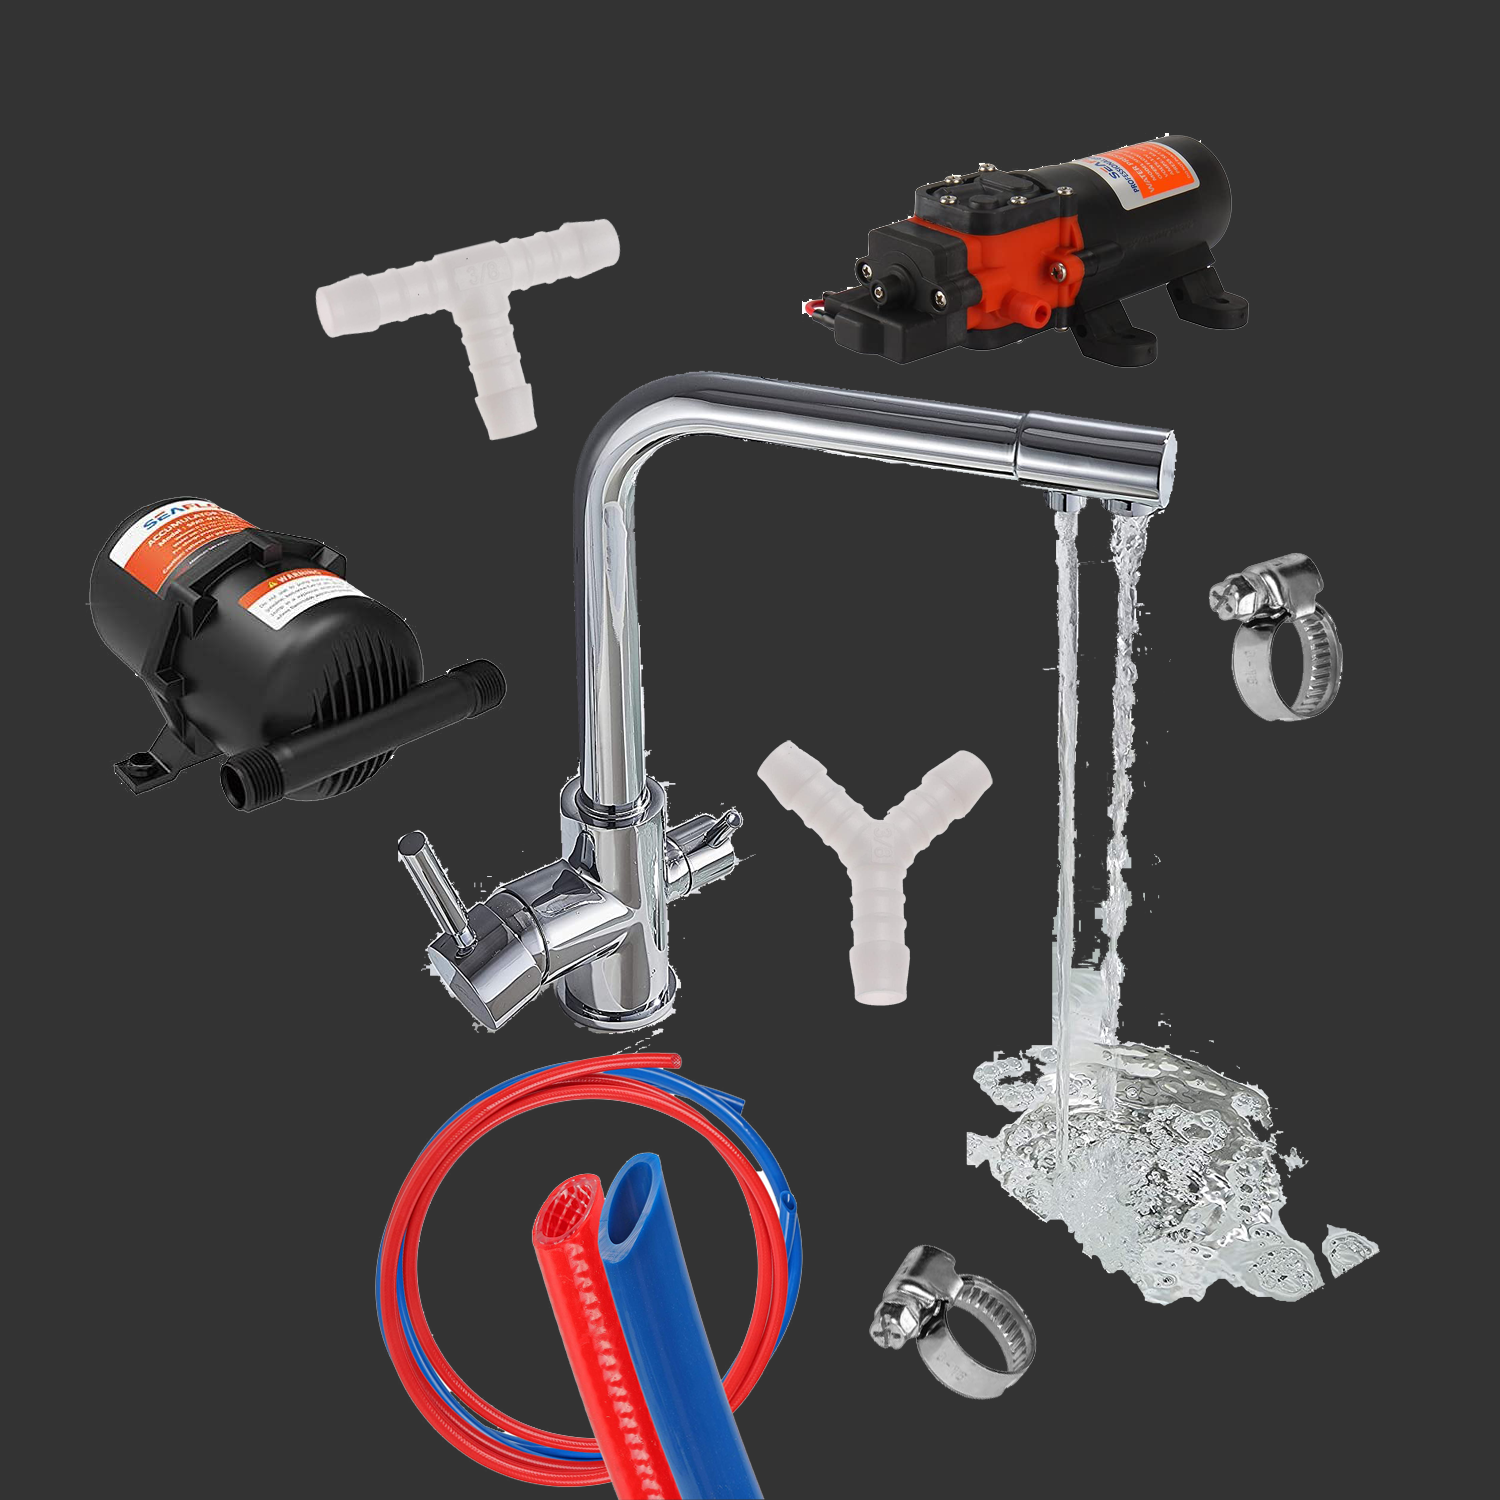
From the tank the water is sucked in by a pressure pump via a pre-filter. But this pre-filter only filters out coarse impurities and serves primarily to protect the tracing hardware. From the pump the water is led over a pressure compensation tank and then goes directly to the first T-piece (one inlet, 2 outlets).
– From outlet 1 of the 1st T-piece (TS) the water goes on to the 2nd TS and from there directly to the cold water connection of the tap at the sink & shower (3rd TS) which completes the cold water supply. - From exit 2 of the 1st TS the water goes to the drinking water filter system and then to the drinking water tap. (There will be a separate contribution for this)
– From exit 2 of the 2nd TS the water goes to the hot water boiler. And from there via a, you guessed it, 4th TS then to the hot water connections of sink & shower.
With this the internal water supply is already finished.
Leaves the disposal. I have decided to do without any chemicals in water consumption and to use only harmless products, so that in most cases I can simply drain the used water under the van. Should I stand in a place where this is not possible, I can simply place a bowl or small canister under the open drain to catch it and dispose of it in a suitable place later. If you don’t want to miss out your shower gel, which smells like foe dust, you have to include a grey water tank, which collects the water in general.
- ;fresh water tank* – The why should be clear. 😉
- pressure water pump* – Self-priming, dry run safe and 2.8 bar are sufficient to get the water to where I need it.
- pressure storage tank* – This is so that the water circuit does not run dry every time. Even if the pump is self-priming, you do not want to wait constantly until the water has been pumped from the tank to the tapping point again. So you turn on the tap and water comes immediately.
- (drinking) water hose set* – you can’t do without it if you don’t want to flood the van.
- Connector set* – T-connectors or Y-connectors and if something was too short you need the I-connector
- hose clamps* – So that nothing shakes loose, always screw it on tightly
- Water tap for drinking water and rinsing water (3in1)* – In order not to have to install an additional tap that lets out the filtered drinking water, I decided to use this practical sink tap that combines warm, cold and drinking water in one.
- shower faucet set in black* – Because it looks cool and as a thermostat version, because I am used to it from home and it is also the most space-saving version, because no additional lever protrudes anywhere. (Alternatively only the fitting in chrome*)
This was the internal feed/supply. With which we did the second step before the first, because the tank has to be filled first. However, since this will be done using a hose/adapter structure based on the Gardena connector system, this is actually something that I don’t plan to do very well, but will simply adapt to the later conditions. It is only worth mentioning that a water filter will also be used in the supply line, which will allow me to get water from standing water without being dirtier after showering than before. 😉
Now the water must flow from the tap somewhere. But there will be a separate contribution to this, because for me this belongs rather in the bathroom or kitchen equipment.